-
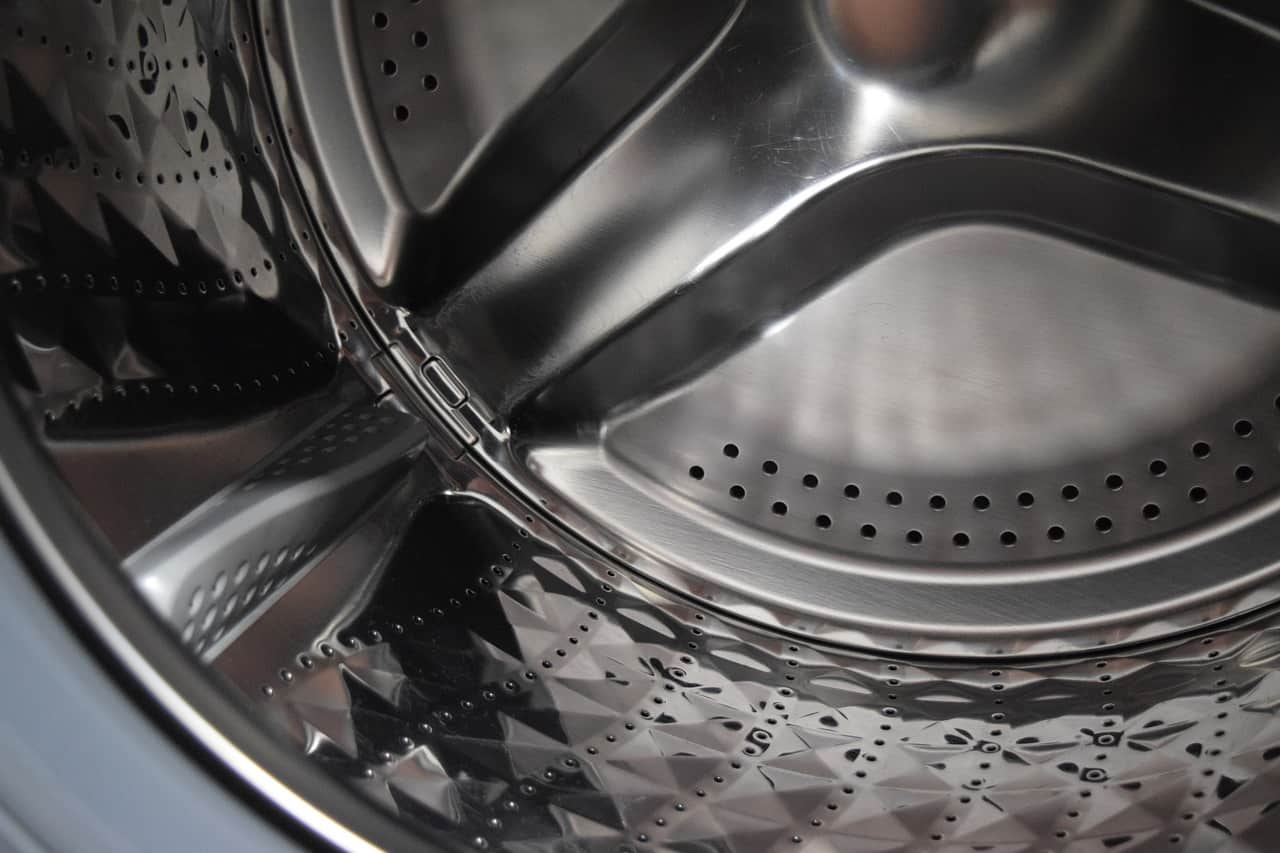
Washing Machine Smells or Not Draining? How Often to Clean It (and When It’s More Than Maintenance)

Most people assume their washing machine stays clean because it is constantly filled with water and detergent. In reality, that moist environment, combined with detergent residue, lint, body oils, and dirt, creates the perfect conditions for buildup behind the drum and inside the drainage system. If your washer is: A proper clean and manual drain…
-
Commercial Appliance Repairs for Cafés & Kitchens in Australia: Repair vs Replace Guide to Minimise Downtime

In cafés and commercial kitchens across Australia, appliance failures don’t just cause inconvenience. They directly impact service, revenue, and day-to-day operations. A coffee machine breaking down during the busy morning rush, often between 7–9 am in many cafés, a refrigerator failing to maintain safe temperatures below 5°C, or a dishwasher going down mid-service can quickly…
-
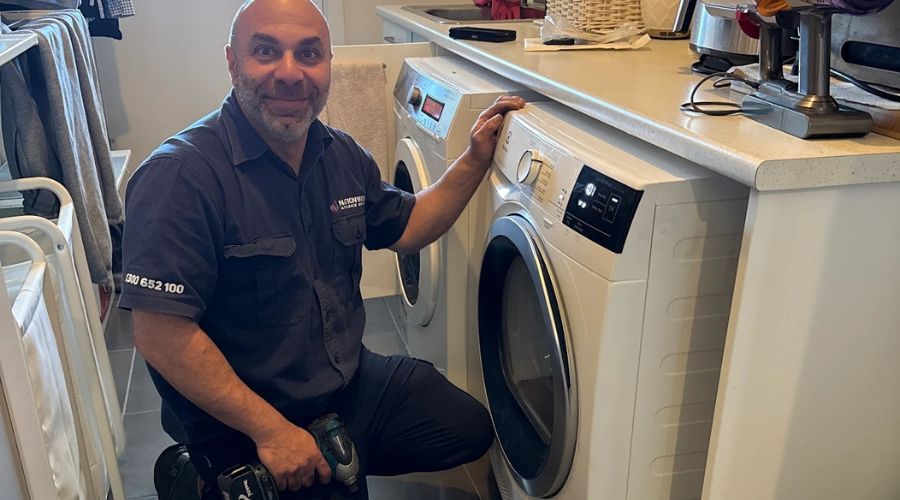
Is It Worth Repairing a Washing Machine in Australia? (Common Problems + Cost Guide)
When a washing machine starts showing signs of failure, many households immediately consider replacement. However, replacement is not always the only option. Across Australian homes, washing machines are often exposed to varying conditions such as heavy usage, mineral-rich water, and seasonal temperature changes. Over time, these factors can contribute to gradual wear rather than sudden…
-
How to Reset Your Stove After a Power Outage: Here’s How to Reset It

Marsh M. | Licensed Appliance Technician | 16 years experience | Perth & Melbourne Your power’s back on but the stove is dead. The clock is blank, the burners won’t respond, or you’re staring at an error code you’ve never seen before. This happens to dozens of Australian households every week — and most of…
-
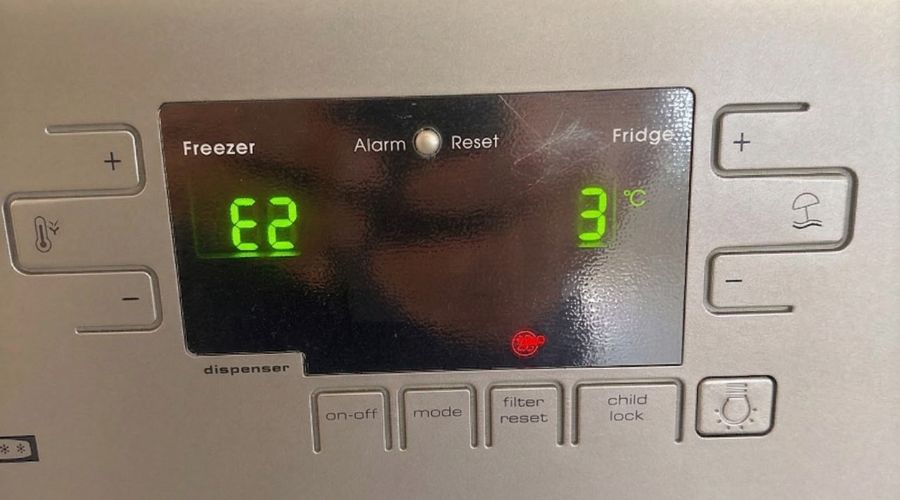
Freezer Error Codes and What They Mean (Australia Guide)
A flashing error code on your freezer is not random. It is the appliance telling you something is not working as it should. You might notice it after the unit starts running longer, or when the temperature begins to rise. In some cases, the code appears before a complete cooling failure. Modern freezers are designed…
-
Freezer Not Freezing Properly? Common Causes and What to Check
A freezer is one of those appliances you don’t think about much. Until it stops doing its job properly. When it’s working as it should, food stays preserved and everything runs in the background without issue. Once the temperature starts rising, you’ll notice it quickly. Food softens, ice begins to melt, and the unit may…
-
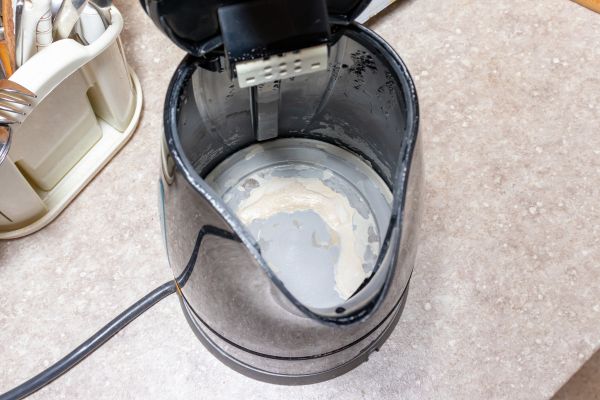
How to Protect Your Appliances from Hard Water in Adelaide
Living in Adelaide has many advantages, but the local water supply can slowly affect household appliances. Adelaide is known for having harder water than many Australian cities. Hard water contains higher levels of minerals such as calcium and magnesium. The water is safe to drink, but these minerals can build up inside appliances that heat…
-
How to Fix a Dishwasher Not Draining in Perth Homes
A dishwasher that refuses to drain properly can quickly turn into a frustrating household problem. Instead of sparkling clean dishes, you’re left with dirty water pooling at the bottom of your machine. This is one of the most common dishwasher issues in Perth homes, and it’s often caused by simple blockages or minor faults that…
-
Microwave Not Heating? Here’s What Might Be Wrong — And What to Do About It
You pop your leftovers in the microwave, press start, the light comes on, the turntable spins—and then… nothing. The food’s still cold. A microwave that runs but doesn’t heat is frustrating, especially when you rely on it for quick meals and daily convenience. While it might seem like the whole appliance is a write-off, the…
-
How to Descale Your Coffee Machine: A Step-by-Step Guide
If you rely on your coffee machine for your daily brew, keeping it in top shape is essential. One of the most important maintenance tasks is descaling—removing the mineral buildup that forms over time from water. Skip it, and you might notice your coffee tasting off, your machine running slower, or even worse, breaking down…
12 Month Warranty
Affordable Rates
Same Day Repair
* Subject Availability
5-Stars Record